Circle Does: Fieldwork to Final Report
So, you’ve completed fieldwork for the Historical Resources Impact Assessment (HRIA). Whether it meant trekking through a snow-covered forest, monitoring construction, or conducting a full-scale excavation, you’ve gathered notes, artifacts, and valuable data. But now comes the real challenge: what to do with all of it?
Here’s the thing—archaeology has no do-overs. Once we dig, we can’t hit rewind, and put everything back the way it was. That’s why reporting isn’t just paperwork–it’s a crucial part of the archaeological process. These reports are the lasting record of the work we’ve uncovered.
And we’re not the only ones who think so. The Alberta Historical Resources Act makes reporting one of the most important requirements for archaeologists. It ensures that the work done in the field is preserved, analysed, and officially documented for the future. So, while digging might be the fun part, writing it all down? That’s what keeps history alive.
Turning raw field data into a comprehensive report may seem tedious (and maybe even a little daunting), but we’ll break down the key elements that make it all come together.
What Triggered the HRIA?
First, we determine what set the HRIA in motion. The report kicks off by outlining the proposed project that will take place after the HRIA, and why the site caught the attention of regulators—maybe it’s cozied up next to a water source, sitting near known archaeological sites, shaped by intriguing topography, or flagged with a Historic Resource Value (HRV). Identifying these factors isn’t just a regulatory checkbox—it helps us understand why this site matters and what stories it might tell.
Methods of Investigation
Now that we know why we’re here, it’s time to get into the nitty-gritty—breaking down the methods of investigation under the research design. This section is key to understanding the techniques used throughout the archaeological assessment. It begins with how archaeologists identify key locations within the project area, methods of field assessment, and the process for how post-field analysis would be carried out and reported on.
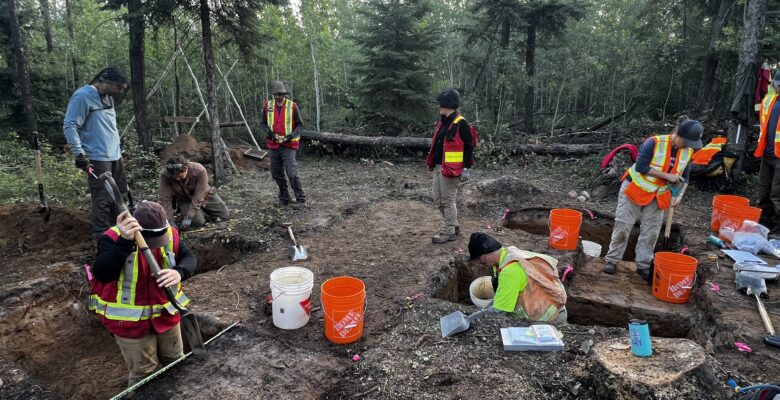
Results
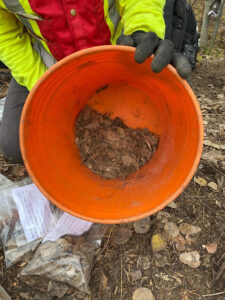
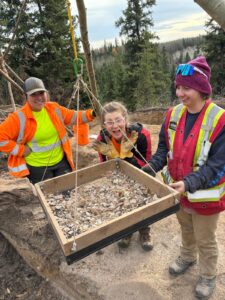
Then comes the bulk of the report—the results. This section lays out exactly what happened during the HRIA process. Each area targeted during the survey is described in terms of the terrain, vegetation, hydrology, along with the type and extent of archaeological investigation carried out. If a shovel testing program was conducted, we detail the number and location of tests. If excavation was carried out, we document the number of units dug and describe what was found. If construction monitoring occurred, we specify the location and type of construction that was observed. Ultimately, we explain what we found underground, uncovering layers that give us a glimpse into the past. And of course, no dig is complete without a deep dive into the soil layers, or as archaeologists like to call it, stratigraphy.
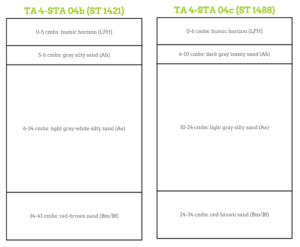
Figure 1: Soil Stratigraphy of Shovel Tests STA 04b and STA 04c
Soil layers recorded at different depths (cm below surface), showing variations in composition, including humic horizons, silty sands, and red-brown subsoil.
Recording Historic Resource Sites and Artifacts
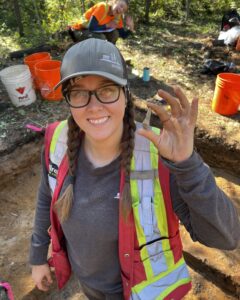
If a historic resource site is identified or revisited, this section takes center stage. If an archaeological site is involved, we must also discuss the artifacts that were recovered. We carefully document every find, creating tables that clearly lay out the number, size, weight, and type of artifacts. But numbers alone don’t tell the whole story. We further analyze what these artifacts might have been used for and how they ended up at the site. Historic sites, on the other hand, come with a little more architecture. If a site has an associated structure, we break it down with artifact tables and very detailed photographs. We use elements of the structure to identify when it was constructed and what it was used for, looking for clues that help piece together its history. To get a fuller picture, we research land titles to trace ownership and determine who may have owned the land or constructed the historic feature.
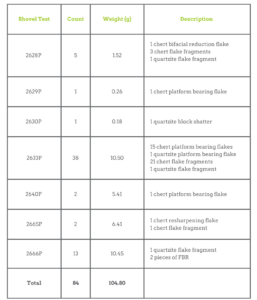
Figure 2: Shovel Test Artifact Summary
Table displaying the count, weight, and description of lithic artifacts recovered from various shovel test units, including chert and quartzite flakes, platform-bearing flakes, and fire-broken rock (FBR).
Recommendations
 After all the digging, analyzing, and reporting, what’s the verdict? If no historic resource sites were identified and the survey finds no heritage or archaeological concerns, we give the green light for the project to move ahead. But if historic resource sites are found, that’s where we shift gears to preservation mode. We may recommend avoiding those areas altogether or putting mitigation measures in place before any work continues. Because while development is important, so is making sure history isn’t lost in the process.
Other Important Elements of a Report
Maps
Maps do more than just mark where we’ve been–they capture the full scope of our survey, showing the work we’ve done and conveying critical information. Our skilled team uses GIS to create comprehensive project maps, including large-scale project maps and detailed site-specific results. These maps provide details of our survey trajectory, landscape details, shovel test locations, and vegetation and hydrology information. We rely on these maps to describe the archaeology and to preserve the work we conducted.
Photographs
A picture may be worth a thousand words, but in archaeology, it’s worth even more! Landscape and site photographs bridge the gap between data and reality, helping to connect text, maps, and findings to the physical world. In the lab, our team captures wonderfully precise photographs of artifacts, making it easier to understand the tools and projectile points we describe in text. After all, sometimes it’s easier to make sense of something when you can see it yourself–come on, we’ve all been guilty of skipping straight to the pictures.
Appendices
This is where all the extra details live—the part of the report that makes you grateful for tables and summaries. Our team diligently compiles all the back-end information, including detailed project plans, Historic Resources Act requirements, site forms, artifact catalogues, schematic soil drawings, and subsurface test logs. These appendices may not be the most thrilling read, but they contain the bulk of the data the report refers to—and trust us, future readers will thank us for it.
Report Review and Submission
Once the report is complete, a digital copy is sent to the client for review. After approval, the final version is submitted to the Archaeological Survey within the Historic Resources Management Branch. The report goes through a government review, and once approved, the digital copy is archived by the Archaeological Survey, while the hard copy finds its permanent home at the Royal Alberta Museum for long-term storage and preservation.
If you’ve made it this far—congratulations! You’ve survived the full reporting process. It may not be as thrilling as unearthing artifacts, but without these reports, the story of the past would risk being lost to time. We hope this blog has given you a clearer understanding of the elements that go into good reporting—and maybe even a newfound appreciation for the hard work archaeologists put into preserving history.
SHARE THIS:


